|
Creating a Carving 1 |
|
A tool known as a bench screw is screwed into the back of the first piece to be carved. This is used to secure the work to the bench, so that the carver has both hands free to work. It is a surprisingly flexible way of fastening the piece and can be used in a variety of methods. The work may also be secured in an upright position so that access can be gained to work from behind. |
|
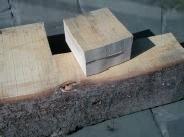
By the afternoon a drawing has been roughed out on the surface of the wood. Although it is based on preliminary sketches , the design will change to suit the characteristics of the timber. To get the balance of the drawing just right takes several hours. Two pieces have been cut, and will be jointed together to give the carving a greater depth, and to make the bottom half stand away from the wall when the finished piece is hung. |
|
April 6th 2000 :- In the morning a plank of lime wood, approximately 115mm (4.5" ) thick is chosen to provide the wood used in the carving. Two pieces the right size to suit the intended carving are cut from the long plank of kiln dried timber. Andrew selects his wood very carefully to get a combination of good colour and strong grain. He nearly always works with English Lime, a timber favoured by many fine carvers for its close grain. |
|
This carving of a Redstart flying across the Guelder Rose was carved over a period of two weeks in April 2000. It was carved as two separate pieces and then joined together, to give the piece a greater depth. No machinery at all is used during the carving, all cutting is done with gouges, which are kept incredibly sharp with regular honing. The following pictures give some idea of the artistic process followed to make the carvings featured on this site
.. |
|
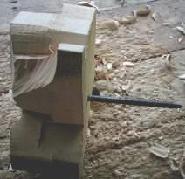
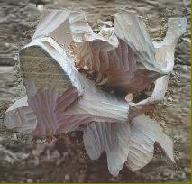
By the end of the first days work a small amount of wood has been removed, which gives some idea of the shapes and forms that will soon emerge. Larger chisels are being used at this stage, and a degree of brute force is being applied with the use of a carvers mallet |
|
April 7th :- The carving slowly takes shape, at this stage it is important to have a clear image of the structure of the finished piece. Removal of the wrong piece of wood now could spell disaster later! |
|
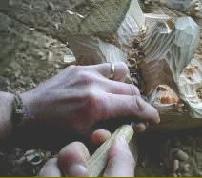
A variety of gouges (chisels) are used throughout the carving, some quite large for rapid removal of wood, others smaller for more delicate work. The gouges are kept razor sharp using a sharpening stone to establish an edge, and maintaining the edge by frequent use of a leather strop, or a felt wheel. |
|
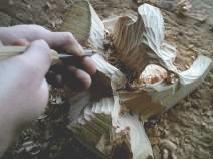
Here, Andrew works in a narrow gap created in the wood, making small cuts and teasing out areas of wood that are difficult to get at . Carving is a slow, and thoughtful process, but a little patience is extremely rewarding. |

|
Fine carving consists of steadily removing small shavings of wood. The gouges are used with a balance of strength and fine control. |
|
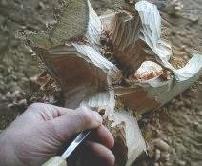
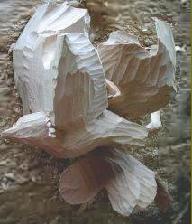
After hours of work on the second day the carving is now taking shape. Somewhere in this chaos a bird flying past wind blown leaves is starting to emerge |
|
April 8th:- The new days work begins by creating greater definition of the bird and surrounding foliage. The gap between the wings begins to emerge. The care taken previously will now pay dividends as the piece 'comes together' . |


|
|
